
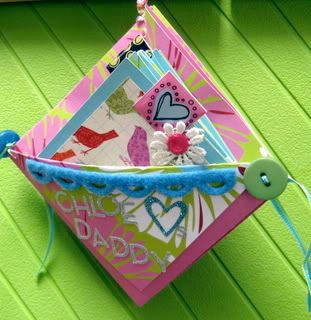
 Here's a unique little accordion album that you can whip up pretty quickly, and makes a cute gift or memento.
Materials:
- Double sided patterned paper: 3 6x6 squares for the inner part of the book, 1 8x8 square for the cover
- wet adhesive (I love my Zip Dry, I think I go through a bottle a week!)
- hole punch/cropadile
- small photos: up to 8 about 2.75 inches square
- scraps of coordinating pp, buttons, ribbon, other embellishments as desired
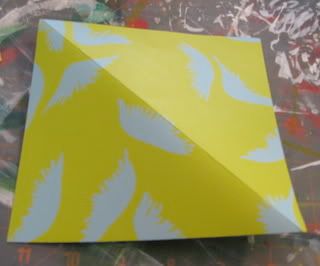 1. Fold one of your 6x6 squares in half diagonally. Unfold, and flip the paper over so that the fold is pointing up (like a mountain).
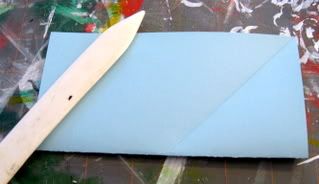 2. Fold again so that the bottom 2 corners meet the upper two corners and you have made a horizontal rectangle.
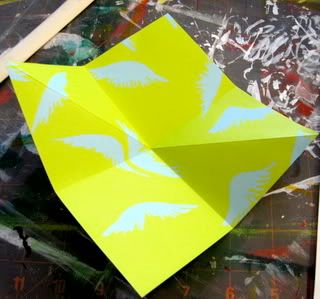 3. Turn the rectangle one-quarter of a turn so that it is now vertical, open, repeat step two, and then open again. It should look like the picture, with two diamonds and four triangles. Make sure your folds are going the right way--your diagonal fold should be a mountain fold (like a peak), and the other two should be valley folds.
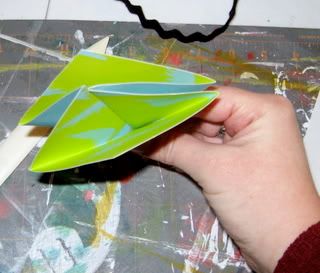 4. Now's where it gets a little tricky. Hold the triangle pairs in both hands and bring them together until they touch. Hold all four triangles in one hand and use your other hand to collapse the "basket," folding the triangles inside the diamonds.
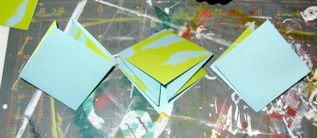 5. Repeat steps 1-4 with the other 2 pieces of 6x6 paper. Notice that I flipped over the pattern on one of them, this will be important when you glue them together.
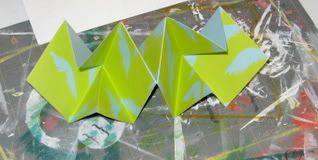 6. Lay out your folded squares like I have them pictured above; on the first one the folded triangles are facing away, on the second they are facing towards, and on the last they are facing away. Now cover the entire top square of the first with glue, and place the second on top, making sure they line up. Do the same to glue the second and third together. The picture shows what they look like once they're all glued together.
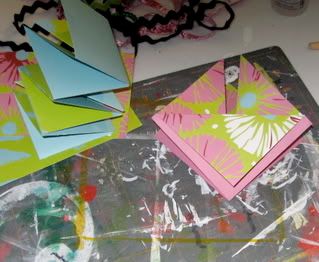 7. To make the cover, fold your 8x8 piece of paper in the same manner, then fold down one of the diamonds to make a flap. Punch holes on the side corners, and tie together using buttons and ribbon, them punch a hole in the top to make hanging loop.
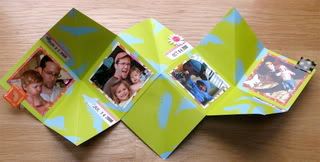
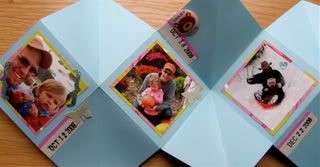
8. Now comes the fun part--add photos and embellish away! I only used 7 pictures for mine, but you could fit lots of little index prints in these, as well as some journaling and tiny embellies. Be sure to link up your projects to this thread for your chance to win the 7 gypsies atc carousel--you have until Midnight Sunday!
3 comments:
what a terrific little tutorial!! awesome album. <3
thanks for sharing!
you rock!
Dude! Awesome tutorial!
That's such a cute book!
Post a Comment