 We’re making easy paper ornaments! These look great hanging from the tree, on top of a gift package, or as room decorations (especially large ones).
Here’s the list of Materials:
Patterned paper— 8.5x11 sheet
Scrap chipboard/cardboard
Bone folder
Circle template and scissors or 2” circle punch
Triangle template
Adhesive—gluestick works fine, I like Zip dry liquid glue
Optional: Ribbon, beads, charms, glitter, glimmer mist
 Step One
Punch 20 circles from patterned paper. If you don’t have a circle punch, you can print the file onto an 8.5x11 piece of patterned paper and cut out the circles by hand.
 Step Two
Using chipboard, make an equilateral triangle that fits perfectly inside your circle.
If your circle is 1” each side of the triangle will be .75”
If your circle is 1.5” each side of the triangle will be 1.25”
If your circle is 2” each side of the triangle will be 1.75”
If your circle is 3” each side of the triangle will be 2.75”
Step Three
Place the chipboard triangle in the center of each circle, and use your bone folder to score along all three sides. Fold these three sides up. Do this for all 20 circles.
Step Four
The next thing is to make is the top and bottom of the ornament. Glue the flaps of 5 circles together so they all touch at the top of the triangle and make a kind of hat. Do this twice.
Step Five 
Make the middle by laying out the next 10, alternating triangles upside-down and right side-up and glue the sides to make a straight line. Then, glue the first flap to the last to make a circle, or tube.
Step Six 
Glue the top “hat” to the top of the tube and the bottom “hat” to the bottom of the tube. Before you are finished gluing, you will want to run your ribbon through, making a hanging loop at the top.
Step SevenWhen it is dry, add ribbon loops or bows to the bottom, or hang beads or charms from the ribbon. Add sparkle with glitter or glimmer mist, then hang up and enjoy!


 Stay warm!
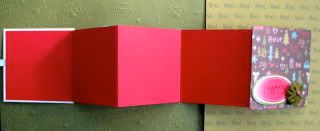
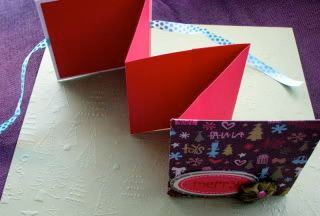 1. Cut two pieces of chipboard 4.5x4.5, two pieces of patterned paper 5x5, and two strips of cardstock 4x6.
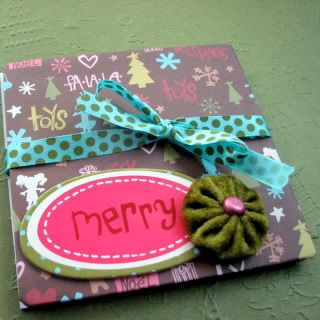
 And that's it! I hope you have fun making an accordion book, remember to be sure to load up your project in the ScrapGal gallery to get your points!
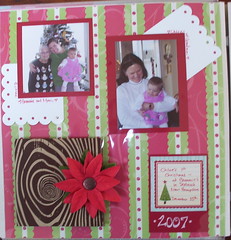

 I finished this set of three puppets for Chloe's Christmas present, aren't the just the cutest!? That's a rabbit in the middle, mouse on the left, and bear on the right. From behind:
 I followed these instructions for the mouse from The Long Thread blog, but added arms and felt hands. Then I adapted the pattern to make the other two. I love rabbit's ears, although I think the expression on his face makes him look a little kookie ;)
 Directions for making this wreath out of recycled ribbon spools are up at Galblog. I had seen a few wreaths made with circles of patterned paper, and looking at the growing pile of spools I have accumulated, I realized they would be perfect for adding some dimension to the wreath. It was fun to make, because the spools are all different sizes and widths, I think it lends itself to these whimsical papers. Plus, I wanted to make something "winter" themed that could stay up past Christmas.
 I loved looking through old Christmas photos, it was fun reminiscing and then picking these two to make layouts for. I also LOVE this Basic Grey paper line, it's not a Christmas line, per-se, but I think the designs work really, really well for holiday-themed projects. I love the non-traditional colors for Christmas that are popping up everywhere, I gotta say straight red and green are not my favorite combination, but add a little light green and turquoise, and I'm all over that!
 We’re making easy paper ornaments! These look great hanging from the tree, on top of a gift package, or as room decorations (especially large ones).
 Step One
 Step Two


 We’re making an organizer for all of your holiday purchases! There are pockets for recipes and receipts, as well as a place for you to record gift lists and expenses, all in a cute mini album. Using a wet erase marker, write down gift ideas for loved ones, keep track of what you have purchased and spent, even menu ideas for holiday get-togethers! Then wipe the pages clean and reuse for another season.


 Step Three
 Step Four


